Yesterday, I spent the whole day tampering with some of my assets from my Divinity's Reach Demo on Unreal Engine 4, and I made a very nice material which involves vertex painting and even generating a procedural normal map.
Today, I'm very short on time so I'll explain things quite briefly (Anyway, you may ask me anything on the comments if you ever have any doubt).
First off, this material was aimed to be used on walls of the houses. The problem was that my houses was pretty low poly, that could be good from a performance view, but I was planing to use vertex color and to use that technique you need a mesh well tessellated... So I went to Maya and I rearranged the topology in order to have more vertex. (From 292 tris to 861... I think some of my teachers would kill me for that polycount).
If you want to give it a try, you may u any tessellated mesh (A cube or a plane will do the job).

Once I've got my mesh and textures imported into Unreal, I started tampering with the material... the beginning was just a basic master material like this one.

Though it seem pretty scary and complex at first glance, it is truly very basic network. These are in fact, 2 materials merged in a single one. We are lerping the input for every channel using the red color from the vertex. Also, as an extra and because this is aimed for painting houses, I added a parameter to control the color of the plaster material. This is how it actually looks like.

Right now our material is not bad, in fact, the material I made for my demo in UDK was pretty similar, but if you keep an eye on real world, cracked wall don't have that smooth blend.
So, I launched photoshop and I made 3 difference clouds textures, packed them in a single texture...anyway, I've could have used the mask I made for the sea material but I dind't remember I already made one.
Now, after tampering a while with nodes, I managed to create a nice alpha for blending.
And this is how my material looked like at this point.
As you see, the blending is way better, but I missed something more and, usually, you would expect that plaster cast some little shadow on the brick (after all, plaster is pretty thick and paint over the bricks).
First I tried to fake the shadow by just offsetting a little my mask and multiply it in the color, but the result was not good at all, so I discarded that. Since this was a gray colored mask, I realised i could use this as a heightmap, and even convert it as normal map.. And I discovered some nice little material functions in Unreal. I was tempted to use the NormalFromHeightmap function but the input was a Texture2D object and not a Float4 as I required. Then I found the NormalFromFunction node which is the same function but it accepted as input 3 Float3. These inputs are in fact the same input but with their UVs off-setted just a little.
This is how I implemented it.

As you see, I have cloned 3 times the code of the alpha mask and then offset the UVs just a little. The result of theses 3 functions was then merged into the NormalFromFunction node, having as a result a cheap, but good enought normal map which will be mixed with the lerped normals. The NormalFromFunction node is actually a material function shipped with UE4. You may as well check how it works inside by just double clicking on it, and even modify it (at your own risk).
I know the material network is pretty messy, but when you have so many wires and nodes, it's almost impossible to don't have wires crossing each other.
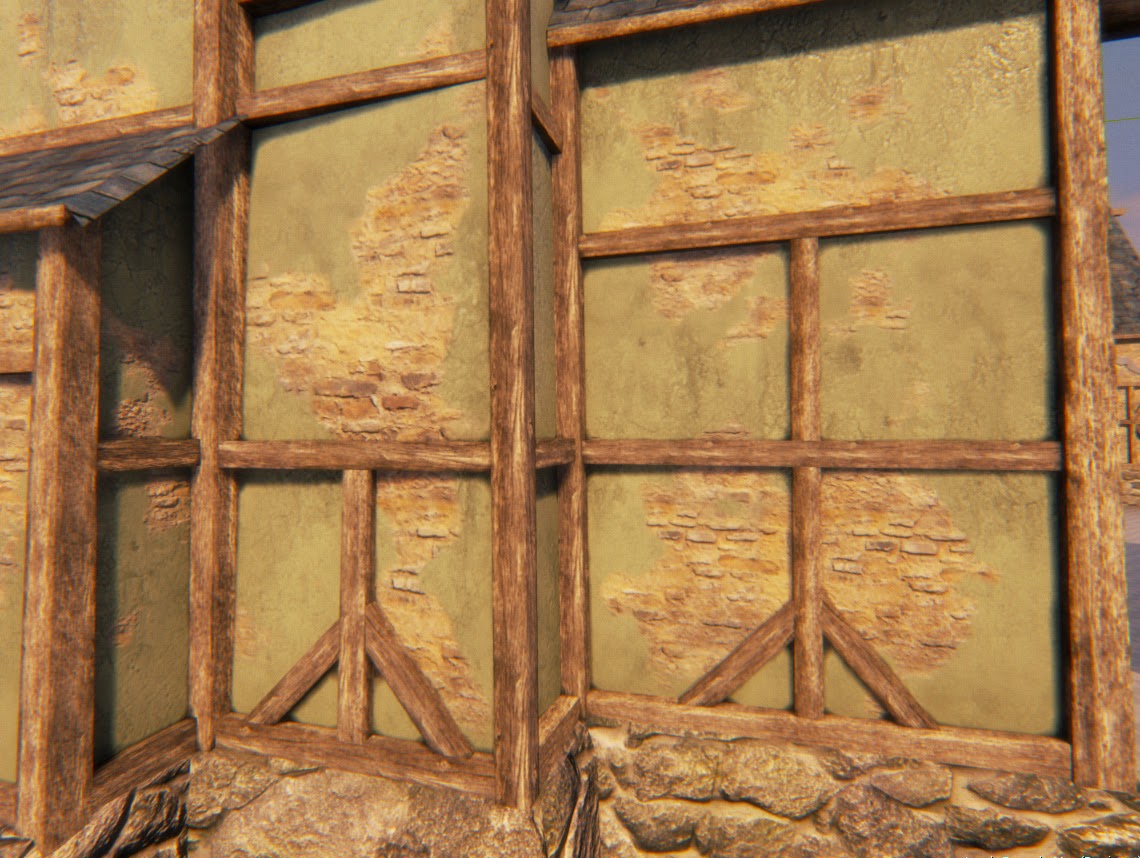
And this is ending the result.

The alpha mask can also be used as a heightmap, and hence, with a little work you may also add some parallax or tessellation to your material. I didn't do it this time but that's something you may do it on your own.

Today, I'm very short on time so I'll explain things quite briefly (Anyway, you may ask me anything on the comments if you ever have any doubt).
First off, this material was aimed to be used on walls of the houses. The problem was that my houses was pretty low poly, that could be good from a performance view, but I was planing to use vertex color and to use that technique you need a mesh well tessellated... So I went to Maya and I rearranged the topology in order to have more vertex. (From 292 tris to 861... I think some of my teachers would kill me for that polycount).
If you want to give it a try, you may u any tessellated mesh (A cube or a plane will do the job).
Once I've got my mesh and textures imported into Unreal, I started tampering with the material... the beginning was just a basic master material like this one.
Though it seem pretty scary and complex at first glance, it is truly very basic network. These are in fact, 2 materials merged in a single one. We are lerping the input for every channel using the red color from the vertex. Also, as an extra and because this is aimed for painting houses, I added a parameter to control the color of the plaster material. This is how it actually looks like.
Right now our material is not bad, in fact, the material I made for my demo in UDK was pretty similar, but if you keep an eye on real world, cracked wall don't have that smooth blend.
So, I launched photoshop and I made 3 difference clouds textures, packed them in a single texture...anyway, I've could have used the mask I made for the sea material but I dind't remember I already made one.
 |
| The noise mask texture I've used for blending |
 |
| Use this as your alpha for every mixing lerp |
As you see, the blending is way better, but I missed something more and, usually, you would expect that plaster cast some little shadow on the brick (after all, plaster is pretty thick and paint over the bricks).
First I tried to fake the shadow by just offsetting a little my mask and multiply it in the color, but the result was not good at all, so I discarded that. Since this was a gray colored mask, I realised i could use this as a heightmap, and even convert it as normal map.. And I discovered some nice little material functions in Unreal. I was tempted to use the NormalFromHeightmap function but the input was a Texture2D object and not a Float4 as I required. Then I found the NormalFromFunction node which is the same function but it accepted as input 3 Float3. These inputs are in fact the same input but with their UVs off-setted just a little.
This is how I implemented it.
As you see, I have cloned 3 times the code of the alpha mask and then offset the UVs just a little. The result of theses 3 functions was then merged into the NormalFromFunction node, having as a result a cheap, but good enought normal map which will be mixed with the lerped normals. The NormalFromFunction node is actually a material function shipped with UE4. You may as well check how it works inside by just double clicking on it, and even modify it (at your own risk).
 |
| NormalFromHeightmap and NormalFromFunction can be both used to generate normals maps on the fly |
And this is ending the result.
The alpha mask can also be used as a heightmap, and hence, with a little work you may also add some parallax or tessellation to your material. I didn't do it this time but that's something you may do it on your own.